190cc briggs and stratton engine manual
Congratulations on acquiring a Briggs & Stratton 875/675 Series 190cc engine! This manual guides successful operation, offering essential insights for optimal performance and longevity.
Engine Overview & Applications
The Briggs & Stratton 190cc engine, specifically the 875 and 675 series, represents a robust and reliable power source widely utilized across a diverse range of outdoor power equipment. This single-cylinder, air-cooled engine is renowned for its user-friendly operation and consistent performance. Commonly found powering lawnmowers, pressure washers, generators, and various other small machinery, its compact design doesn’t compromise on power delivery.
Its applications extend to both residential and commercial settings, making it a versatile choice for homeowners and professionals alike. The engine’s straightforward design simplifies maintenance, while its durable construction ensures long-term dependability. Understanding its core functionalities and intended uses is crucial for maximizing its efficiency and extending its operational lifespan. This engine is a staple in the industry, known for its consistent starting and smooth running characteristics.
Safety Precautions & Warnings
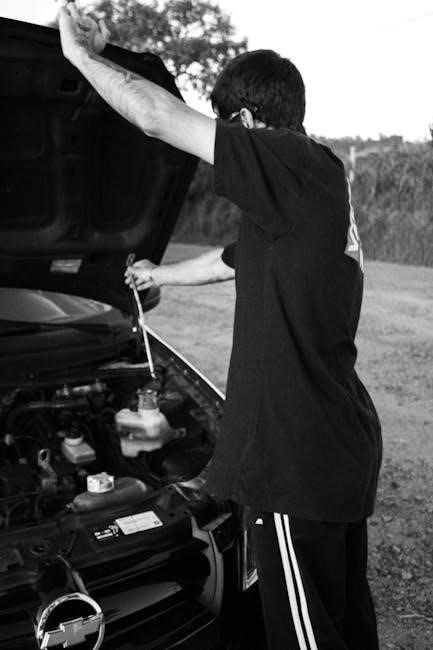
Crucially, before operating your Briggs & Stratton 190cc engine, thoroughly read and understand all safety precautions outlined in this manual. Always disconnect the spark plug wire before performing any maintenance or adjustments to prevent accidental starting. Never operate the engine in enclosed spaces due to the risk of carbon monoxide poisoning – ensure adequate ventilation.
Wear appropriate safety gear, including eye protection and gloves, during operation and maintenance. Keep children and bystanders away from the operating engine. Avoid contact with hot engine components, such as the muffler, to prevent burns. Refuel only when the engine is cool and with the engine stopped. Store fuel in approved containers and away from heat sources. Be mindful of flammable materials when operating near dry vegetation. Ignoring these warnings can lead to serious injury or property damage.
Engine Components & Identification
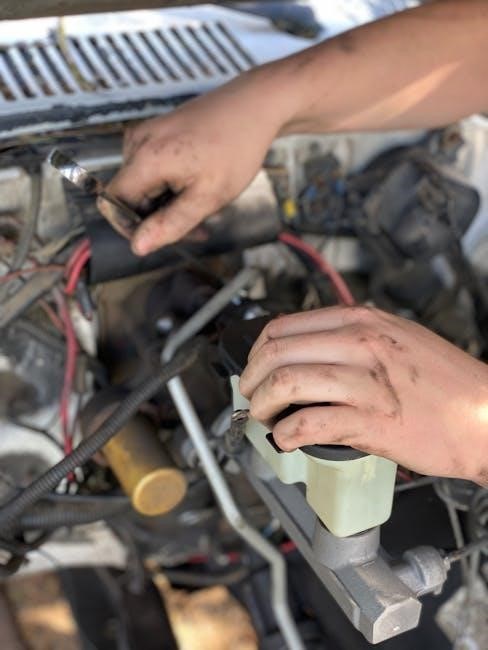
Familiarize yourself with key components: the cylinder, piston, crankshaft, connecting rod, carburetor, and recoil starter, ensuring proper understanding for maintenance tasks.
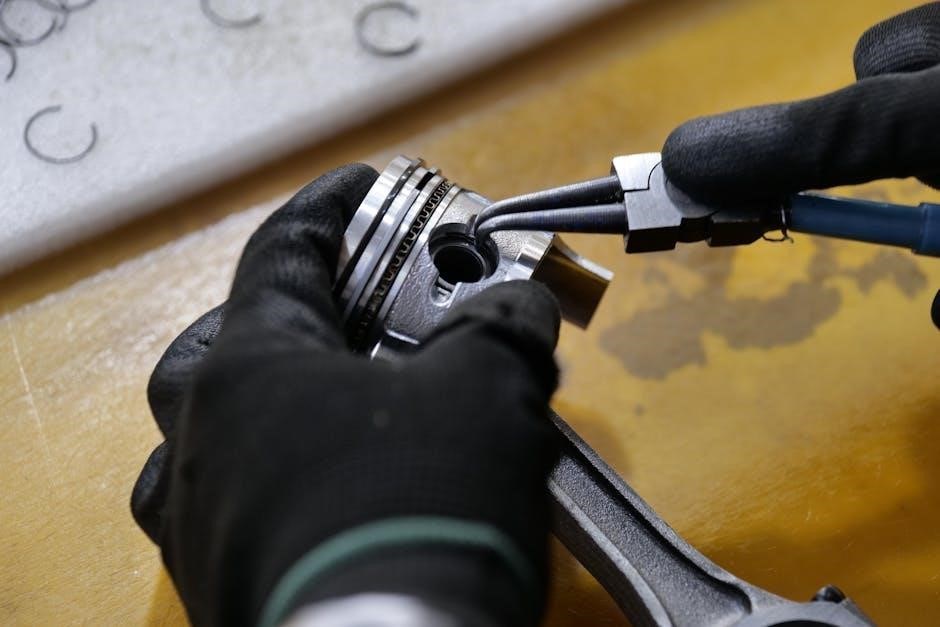
Cylinder & Piston Assembly
The cylinder, a crucial engine component, houses the piston and provides the combustion chamber. Inspect for scoring or damage, which can compromise compression and engine performance. The piston, moving within the cylinder, converts combustion pressure into mechanical energy via the connecting rod.
Regularly check the piston rings for wear or breakage; these rings seal the combustion chamber, preventing gas leakage and maintaining efficient operation. Proper piston ring seating is vital for optimal compression. Examine the piston pin, ensuring it’s securely fastened and shows no signs of excessive wear.
Maintaining correct cylinder head torque is essential for a proper seal. Always refer to the torque specifications outlined in the technical section of this manual. A damaged cylinder or piston assembly necessitates professional repair or replacement to avoid further engine damage and ensure continued reliable performance.
Crankshaft & Connecting Rod
The crankshaft is the engine’s backbone, converting the piston’s reciprocating motion into rotational power. Inspect the crankshaft journal surfaces for scoring, pitting, or bluing – indicators of bearing failure or overheating. A smooth, polished surface is crucial for efficient operation and longevity.
The connecting rod links the piston to the crankshaft, transmitting force and enabling rotational movement. Check the connecting rod for bends or cracks, as these can cause significant engine imbalance and damage. Ensure the connecting rod bearings are properly lubricated and show no signs of wear.
Proper alignment between the crankshaft, connecting rod, and piston is paramount. Any misalignment can lead to premature wear and potential engine failure. Regularly inspect these components during maintenance and replace them if any damage or excessive wear is detected, ensuring continued reliable engine performance.
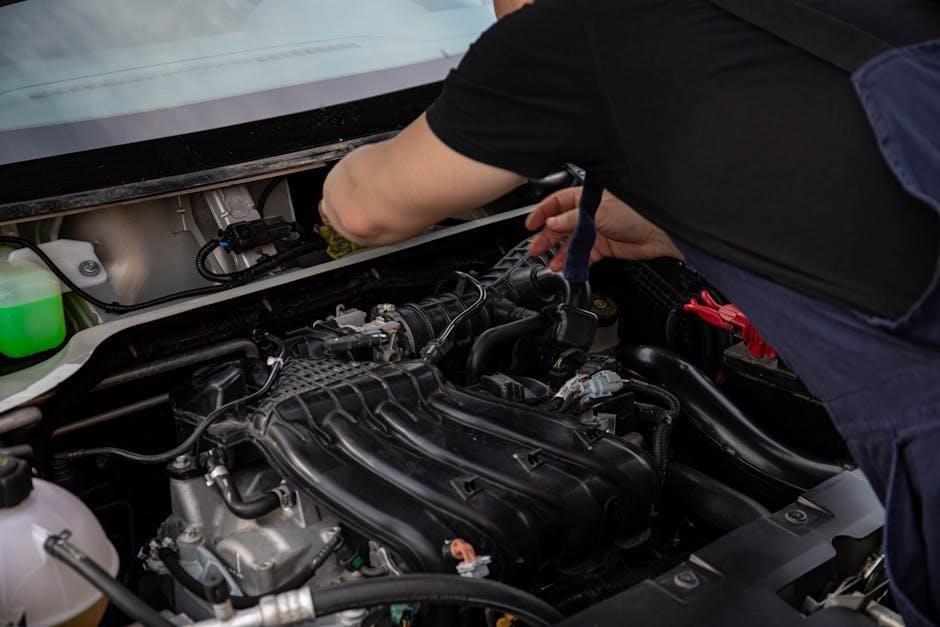
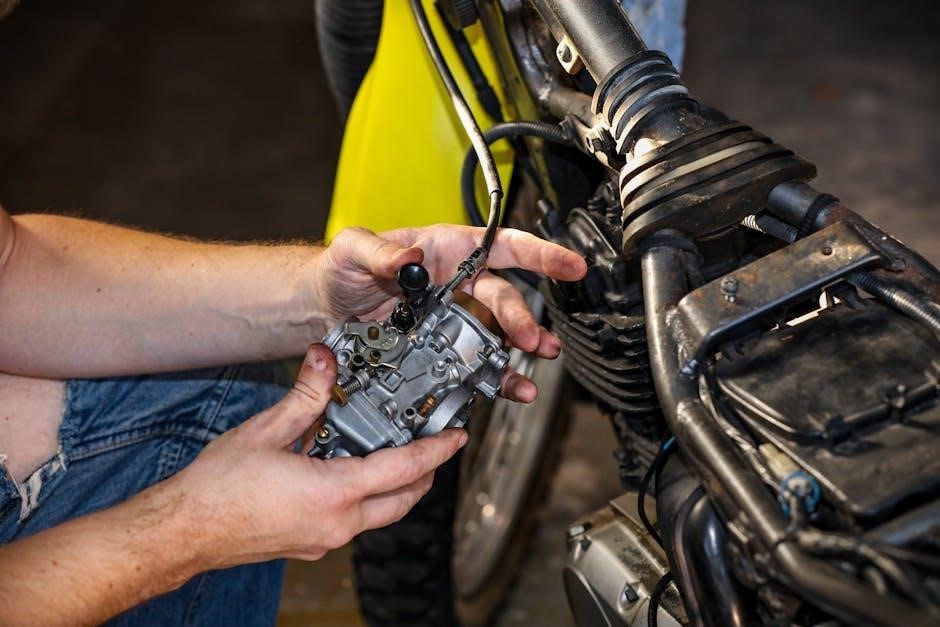
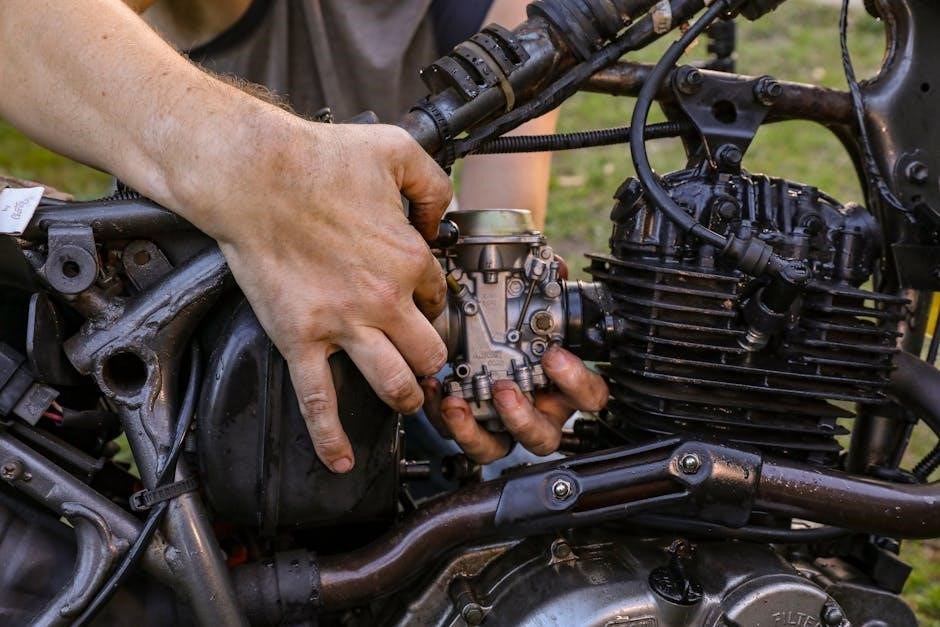
Carburetor System
The carburetor meticulously mixes air and fuel to create a combustible mixture for the engine. It’s comprised of several key components, including the float, jets, and throttle valve. A clogged carburetor is a frequent cause of starting or running issues.

Regular inspection of the carburetor is vital. Check the float for proper movement and the jets for obstructions. Fuel residue can accumulate, hindering performance. Cleaning the carburetor with a carburetor cleaner is often necessary, ensuring all passages are clear.
Pay close attention to the throttle linkage, ensuring smooth operation. A sticky throttle can cause erratic engine speed. Proper carburetor adjustment is crucial for optimal fuel efficiency and power output. Consult the engine’s specifications for correct settings, maintaining peak performance.
Maintenance Procedures
Consistent upkeep ensures reliable operation. Regularly scheduled oil changes, spark plug checks, and air filter cleaning are paramount for longevity and peak performance.
Oil Change & Filter Replacement
Maintaining proper lubrication is crucial for your Briggs & Stratton 190cc engine’s health. Oil should be changed after the first 25 hours of operation, and then every 50 hours thereafter, or annually, whichever comes first. Always use oil that meets API service classification SJ or better.
Before beginning, warm the engine slightly for easier oil drainage; Locate the oil drain plug, typically at the bottom of the engine. Place a suitable container underneath to catch the used oil. Remove the plug and allow the oil to drain completely. Reinstall the plug, ensuring it’s tightened securely.
Next, replace the oil filter. Unscrew the old filter (a filter wrench may be necessary) and lightly lubricate the gasket of the new filter with fresh oil. Screw on the new filter hand-tight, then tighten an additional half to three-quarters of a turn. Finally, fill the engine with the correct amount of oil, checking the dipstick to confirm the proper level. Dispose of used oil responsibly.
Spark Plug Inspection & Replacement
Regular spark plug inspection is vital for ensuring efficient engine combustion. Inspect the spark plug every 25 hours of operation, or annually. A properly functioning spark plug will have a clean, light tan or gray color. Signs of fouling – carbon buildup, oil residue, or a wet appearance – indicate a problem.
To inspect, carefully remove the spark plug using a spark plug wrench. Examine the electrode for wear, damage, or excessive buildup. Clean a lightly fouled plug with a wire brush. If the plug is heavily fouled, cracked, or the electrode is worn, it must be replaced.
When replacing, ensure you use the correct spark plug specified for your Briggs & Stratton 190cc engine. Gap the new plug to the manufacturer’s specifications (typically 0.030 inches) using a spark plug gapping tool. Carefully install the new plug, tightening it to the recommended torque. A properly functioning spark plug ensures reliable starting and optimal engine performance.
Air Filter Cleaning & Replacement
Maintaining a clean air filter is crucial for optimal engine performance and longevity. A dirty air filter restricts airflow, leading to reduced power and increased fuel consumption. Inspect the air filter every 25 hours of operation, or more frequently in dusty conditions.
To clean a foam air filter, remove it from the air filter housing. Wash the filter in warm, soapy water, then rinse thoroughly. Allow the filter to dry completely before lightly oiling it with air filter oil. Squeeze out any excess oil. For paper air filters, gently tap the filter to remove loose debris. Do not wash a paper filter.
Replace the air filter if it is damaged, excessively dirty, or cannot be adequately cleaned. Use only a genuine Briggs & Stratton replacement air filter to ensure proper fit and filtration. A clean air filter protects the engine from abrasive particles and ensures efficient operation.
Troubleshooting Common Issues
Addressing common problems ensures continued reliable operation. This section details solutions for issues like starting difficulties, rough running, and overheating, maximizing engine uptime.
Engine Won’t Start

If your 190cc Briggs & Stratton engine fails to start, systematically check several key areas. First, verify the fuel system: ensure the fuel tank isn’t empty and the fuel shut-off valve (if equipped) is open. Inspect the fuel line for kinks or obstructions. A clogged carburetor is a frequent culprit; cleaning or rebuilding it may be necessary.
Next, examine the ignition system. Confirm the spark plug is clean, properly gapped, and receiving a strong spark. Test the spark plug by grounding it against the engine block while pulling the starter rope. If no spark is present, investigate the ignition coil and magneto.
Also, check the safety interlocks – ensure the operator presence control (if applicable) is functioning correctly. Finally, confirm the engine is not flooded; if it is, allow it to air out before attempting to restart. Low compression can also prevent starting, requiring further diagnosis.
Engine Runs Rough
A rough-running 190cc Briggs & Stratton engine typically indicates an issue with fuel delivery, air intake, or combustion. Begin by inspecting the spark plug; a fouled or worn spark plug can cause misfires. Clean or replace it as needed. Next, assess the air filter – a dirty air filter restricts airflow, leading to a rich fuel mixture and rough operation. Clean or replace the air filter element.
The carburetor is often a source of problems. Check for clogged jets or passages, and clean the carburetor thoroughly. Ensure the carburetor float is functioning correctly. Fuel quality is also crucial; stale or contaminated fuel can cause rough running. Drain the old fuel and refill with fresh gasoline.
Finally, consider valve issues. Worn or improperly adjusted valves can disrupt the combustion process. Valve adjustment may be required to restore smooth engine operation.
Engine Overheating
Overheating in your 190cc Briggs & Stratton engine is a serious concern that demands immediate attention. A primary cause is often insufficient cooling, frequently linked to a blocked cooling fan or shroud. Inspect these components, ensuring the fan spins freely and the shroud is securely in place directing airflow. Low oil levels are another critical factor; oil provides vital lubrication and cooling. Always verify the oil level before operation and top up if necessary.
A clogged air filter restricts airflow, contributing to increased engine temperature. Clean or replace the air filter regularly. Examine the carburetor for improper fuel mixture settings, as a lean mixture can cause excessive heat. Ensure proper ventilation around the engine; avoid operating it in confined spaces.
If overheating persists, inspect the cylinder head for damage or leaks. A compromised head gasket can lead to coolant loss and overheating.
Repair & Parts Replacement
Addressing engine issues often requires component repair or replacement. Genuine Briggs & Stratton parts ensure compatibility and optimal performance, maintaining engine reliability and longevity.
Valve Adjustment
Proper valve clearance is crucial for optimal engine performance. Incorrect settings can lead to reduced power, poor fuel efficiency, and even engine damage. This procedure requires precision and patience.
To adjust valves, first, ensure the engine is cool and the valve cover is removed. Rotate the crankshaft until the intake valve for the cylinder being adjusted is fully closed. Use a feeler gauge to measure the clearance between the valve stem and the rocker arm.
Specifications typically call for a specific range, often around 0;05-0.15 inches. Adjust the clearance by turning the adjusting screw on the valve stem. Tighten to decrease clearance and loosen to increase it. Repeat for the exhaust valve, rotating the crankshaft 180 degrees. Always re-torque the valve cover to the manufacturer’s specifications after adjustment. Incorrect adjustment can cause significant engine problems.
Carburetor Repair
A malfunctioning carburetor is a common cause of engine issues, often resulting in hard starting, rough idling, or reduced power. Disassembly requires careful attention to detail to ensure proper reassembly.
Begin by disconnecting the fuel line and carefully removing the carburetor. Thoroughly clean all components with carburetor cleaner, paying close attention to jets and passages. Compressed air can help clear obstructions. Inspect the float, needle valve, and seat for wear or damage; replace if necessary.
Reassemble the carburetor, ensuring all gaskets and seals are in good condition; Pay attention to the proper orientation of parts. Reinstall the carburetor and reconnect the fuel line. Adjust the idle speed and mixture screws according to the engine’s specifications. A properly repaired carburetor restores optimal engine performance and fuel efficiency.
Recoil Starter Repair
A faulty recoil starter prevents easy engine starting, often due to a broken pawl, worn spring, or damaged rope. Begin by removing the recoil starter assembly from the engine, noting the position of any retaining clips or screws.
Inspect the recoil rope for fraying or breakage, replacing it if necessary. Examine the pawl, ensuring it engages and disengages smoothly with the engine’s crankshaft. A worn or broken pawl will require replacement. Check the spring for proper tension; a weak spring won’t provide sufficient retraction.
Lubricate all moving parts with a light oil. Reassemble the recoil starter, ensuring the rope is properly wound and the pawl engages correctly. Reinstall the assembly onto the engine. A properly functioning recoil starter ensures reliable and effortless engine starting.
Technical Specifications
This engine boasts a 190cc displacement, delivering reliable power. Key specs include dimensions, weight, and torque ratings crucial for informed operation and maintenance.
Engine Dimensions & Weight
Understanding the physical characteristics of the Briggs & Stratton 190cc engine is vital for proper installation and compatibility within various applications. Precise dimensions ensure seamless integration into lawnmowers, pressure washers, and other power equipment. Typically, the engine’s length measures approximately 18.7 inches (475 mm), while the width spans around 15.7 inches (399 mm), and the height reaches about 17.3 inches (439 mm).
However, these figures can slightly vary depending on the specific model and any attached components. The dry weight of the engine generally falls within the range of 49 to 55 pounds (22;2 to 25 kg). This weight is a critical factor when considering the overall balance and maneuverability of the equipment it powers. Accurate weight and dimension data are essential for transportation, storage, and ensuring structural integrity during operation. Always refer to the specific engine model’s documentation for the most precise specifications.
Torque Specifications
Maintaining proper torque levels on all fasteners is crucial for the reliable operation and longevity of your Briggs & Stratton 190cc engine. Incorrectly tightened bolts and nuts can lead to component failure, vibration, and reduced performance. Generally, the cylinder head bolts require a torque of 18-22 ft-lbs (24-30 Nm) in a specific sequence to ensure even pressure.
The connecting rod cap bolts should be tightened to 15-18 ft-lbs (20-24 Nm), and the crankshaft bolts typically demand 30-35 ft-lbs (41-47 Nm). It’s essential to use a calibrated torque wrench for accurate measurements. The valve cover bolts require a lighter touch, around 6-8 ft-lbs (8-11 Nm). Always consult the engine’s service manual for the precise torque specifications applicable to your specific model, as variations can occur. Following these guidelines will prevent damage and ensure optimal engine function.
Wiring Diagram (if applicable)
For Briggs & Stratton 190cc engines equipped with electric start, a basic wiring diagram is essential for troubleshooting and repair. Typically, the system includes a charging coil, a solenoid, a starter motor, and a battery (if equipped). The charging coil generates electricity when the engine runs, charging the battery and powering the ignition system.
The solenoid acts as a switch, connecting the battery to the starter motor when activated by the start switch. A safety switch, often integrated with the blade engagement lever, prevents accidental starting. Wiring colors vary by model, but common colors include red (positive), black (negative/ground), and yellow (charging circuit). Always disconnect the spark plug wire before working on the electrical system. Refer to your engine’s specific service manual for a detailed and accurate wiring diagram, as configurations can differ.